



 English
  中文简体
中文简体 
HOME / NEWS / Industry News / How to Use a Sponge Swab for Surface Sampling: Complete Guide
Lab & Sampling Supplies
Content
- 1 How to Use a Sponge Swab for Surface Sampling
- 2 What Is a Sponge Swab Used For?
- 3
- 4 What Is Sponge Swab Sampling?
- 5 How Does Sponge Swab Sampling Work?
- 6 Sponge Swab Sampling Procedure
- 7 How to Collect a Surface Sample with a Sponge Swab
- 8 How to Use a Sterile Sponge Swab
- 9 How to Test Surfaces for Bacteria with a Sponge Swab
How to Use a Sponge Swab for Surface Sampling
Sponge swabs are a standard tool for collecting surface samples in food safety, environmental monitoring, and cleanroom validation, but getting a reliable result depends on using the right technique. This guide covers what sponge swabs are used for, how sampling works, and the correct procedure for collecting a usable sample.
What Is a Sponge Swab Used For?
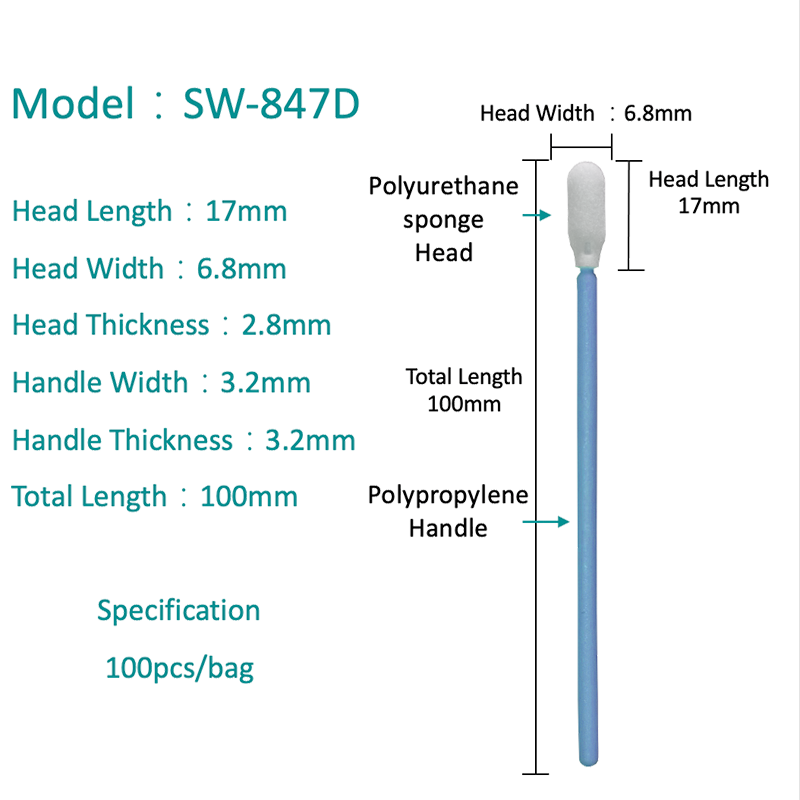
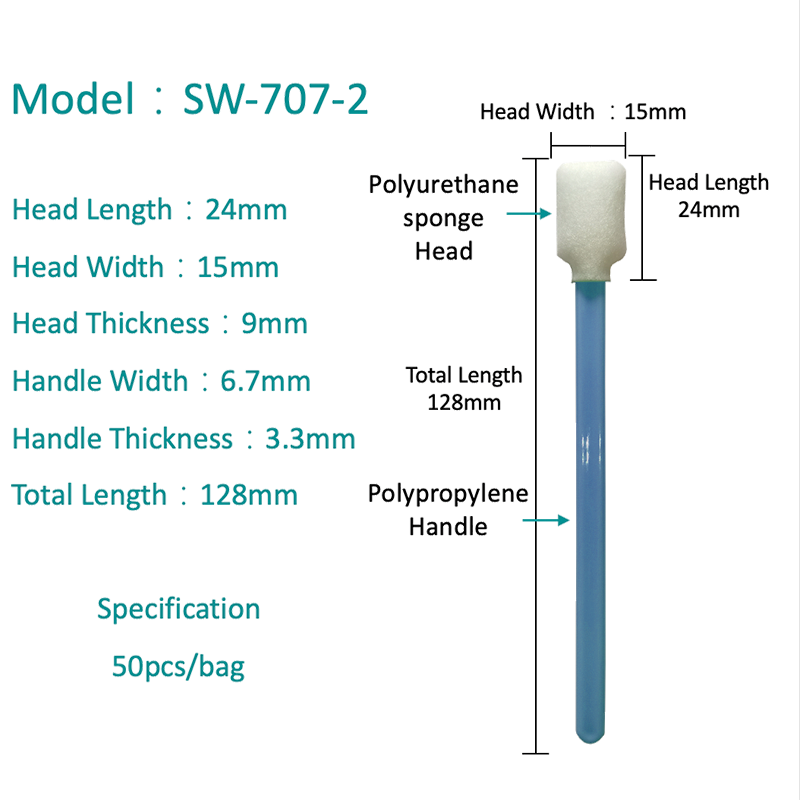
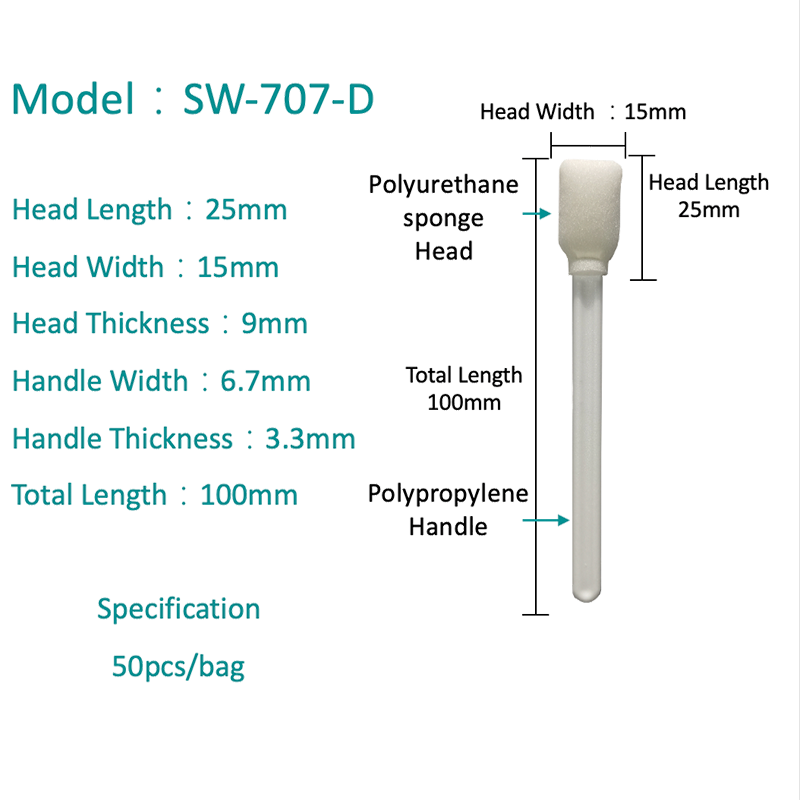
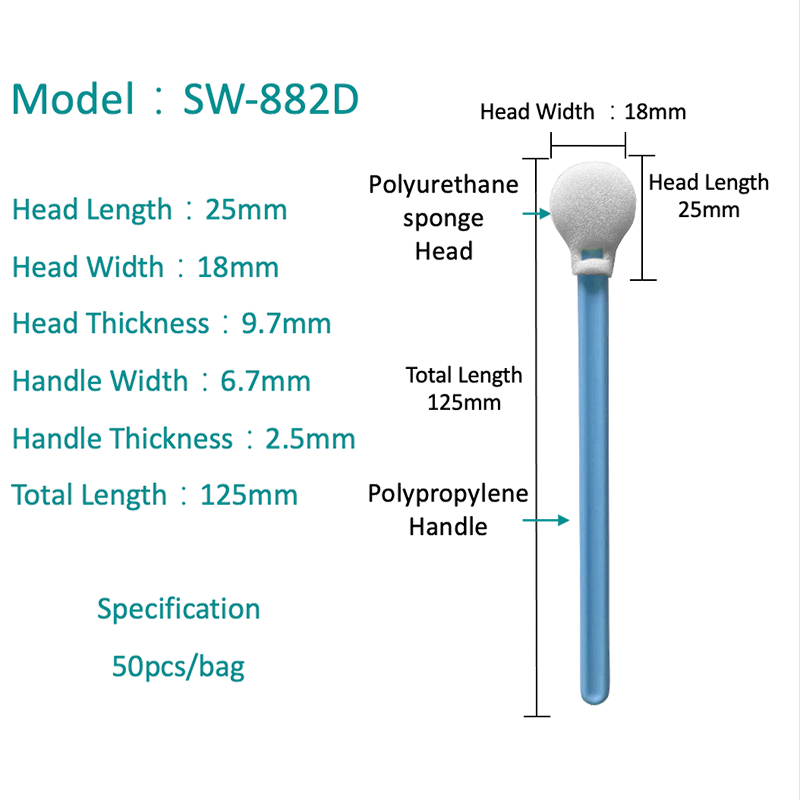
A sponge swab is used to collect microbial or residue samples from surfaces that are too large, textured, or irregular for a standard cotton or foam swab to sample effectively. The larger absorbent sponge head covers more surface area per sample, making it well suited to surface hygiene testing, environmental monitoring in food processing facilities, and validation swabbing in cleanroom or pharmaceutical environments.
Food Safety
Testing processing surfaces, equipment, and contact points for bacterial contamination.
Environmental Monitoring
Routine surface testing programs in food and beverage facilities.
Cleanroom Validation
Verifying cleaning and disinfection effectiveness on production surfaces.
What Is Sponge Swab Sampling?
Sponge swab sampling is a surface sampling method where a pre-moistened (or dry) sponge is rubbed across a defined surface area to pick up microorganisms or residue, which is then transferred to a lab or test kit for analysis. Because the sponge covers a larger area than a standard swab tip, it's particularly effective for detecting low levels of contamination that might be missed if only a small spot were sampled.
How Does Sponge Swab Sampling Work?
Sponge swab sampling works by physically transferring microorganisms from a surface onto the sponge material as it's rubbed across the surface in a controlled pattern. The moisture in a pre-hydrated sponge helps loosen and capture organisms that might otherwise remain adhered to a dry surface. After sampling, the sponge is placed into a sterile sample bag or container, and either sent to a lab for culturing and analysis or processed with an on-site rapid test method, depending on the testing program.
Sponge Swab Sampling Procedure
1. Prepare the swab: if using a dry sponge swab, moisten it with the appropriate neutralizing buffer before sampling; pre-hydrated swabs are ready to use directly from the package.
2. Define the sample area: use a template or measured area (commonly 4x4 inches or as specified by your testing protocol) to keep sample size consistent between tests.
3. Swab the surface: rub the sponge firmly across the defined area, first in one direction and then perpendicular to it, to maximize contact and pickup.
4. Rotate the sponge: flip or rotate the sponge partway through sampling so a fresh surface continues picking up material.
5. Return to the bag: place the sponge back into its sterile sample bag immediately after swabbing to prevent contamination or drying out before testing.
6. Label and store: label the sample with location, date, and time, and store or ship according to your test method's temperature requirements.
How to Collect a Surface Sample with a Sponge Swab
Collecting a usable surface sample depends on consistent technique across every sample taken, since inconsistent pressure, coverage, or sample area size makes it difficult to compare results over time or between locations. Always sample the same defined area size and use a consistent swabbing pattern — this consistency matters more for trend tracking in an environmental monitoring program than any single sample result on its own.
How to Use a Sterile Sponge Swab
Sterile sponge swabs are packaged to remain contamination-free until use, so proper handling matters as much as sampling technique. Avoid touching the sponge head directly with bare hands, keep the swab in its sterile packaging until immediately before sampling, and avoid setting the sponge down on any surface other than the one being sampled. Any break in sterile handling can introduce contamination that skews results, particularly for low-level contamination testing where a small amount of cross-contamination can produce a false positive.
How to Test Surfaces for Bacteria with a Sponge Swab
Testing surfaces for bacteria with a sponge swab typically follows the standard sampling procedure above, with the sample then sent for lab culturing, processed with an ATP (adenosine triphosphate) rapid test system, or analyzed with a specific pathogen test kit depending on what the testing program is designed to detect. ATP testing gives a fast general cleanliness indicator, while culture-based lab testing provides more specific identification of bacterial species when that level of detail is required.
Choosing between rapid on-site testing and lab-based culturing depends on how quickly results are needed and how specific the identification requirements are — routine cleaning verification often favors fast ATP testing, while regulatory or investigative testing typically requires the more detailed results a lab culture provides.

 ADDRESS
 CONTACT
 FAX
FAX EMAIL
EMAIL
